I’ve fried enough empanadas to know that getting that perfect golden crust isn’t about luck.
You’re here because your Colombian fried foods keep coming out greasy or soggy. Or maybe they look great but taste nothing like what you had in Medellín.
I get it. Fritanga is an art.
Here’s the thing: most home cooks focus on the recipe when the real secret is in the technique. The oil temperature. The timing. The way you prep your ingredients before they even hit the pan.
I’ve spent years testing different methods to nail that crispy exterior and tender inside. The kind you get from street vendors in Bogotá or at family gatherings in Cartagena.
This frying guide cwbiancarecipes breaks down everything you need to know. Not just what to cook but how to cook it right.
You’ll learn why your empanadas turn out oily (and how to fix it). How to get arepas that are crispy outside and fluffy inside. What makes papas rellenas hold together instead of falling apart in the oil.
No fancy equipment needed. Just the right techniques that respect how these dishes are meant to be made.
Your fritanga is about to get a whole lot better.
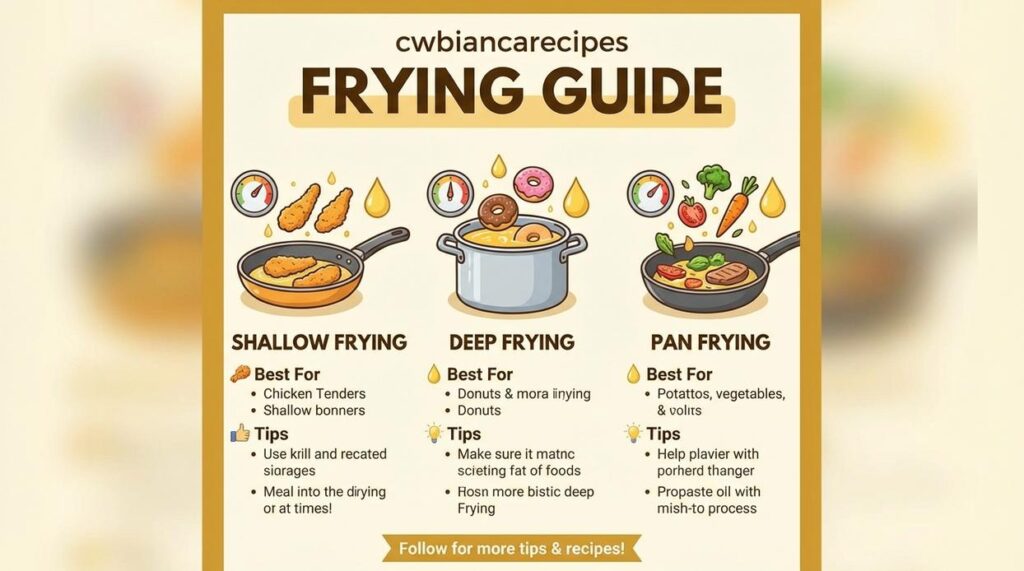
The Foundation: Oil, Temperature, and Seasoning
You want crispy empanadas that don’t taste like an oil slick?
Start here.
Most people think frying is simple. Heat oil, drop food in, wait. But that’s how you end up with soggy, greasy disasters that sit heavy in your stomach.
I’m going to tell you something that might sound obvious but most home cooks ignore it anyway.
Your oil choice matters more than you think.
In Colombia, we reach for vegetable oil, canola, or sunflower oil. Not because they’re fancy. Because they have high smoke points and won’t burn before your food gets crispy.
Some people swear by olive oil or butter for everything. They say it adds flavor. And sure, for some dishes that works. But for frying? You’re just asking for burnt, bitter food and a kitchen full of smoke.
Here’s what they miss. Neutral oils let the food taste like food. Not like whatever oil you used.
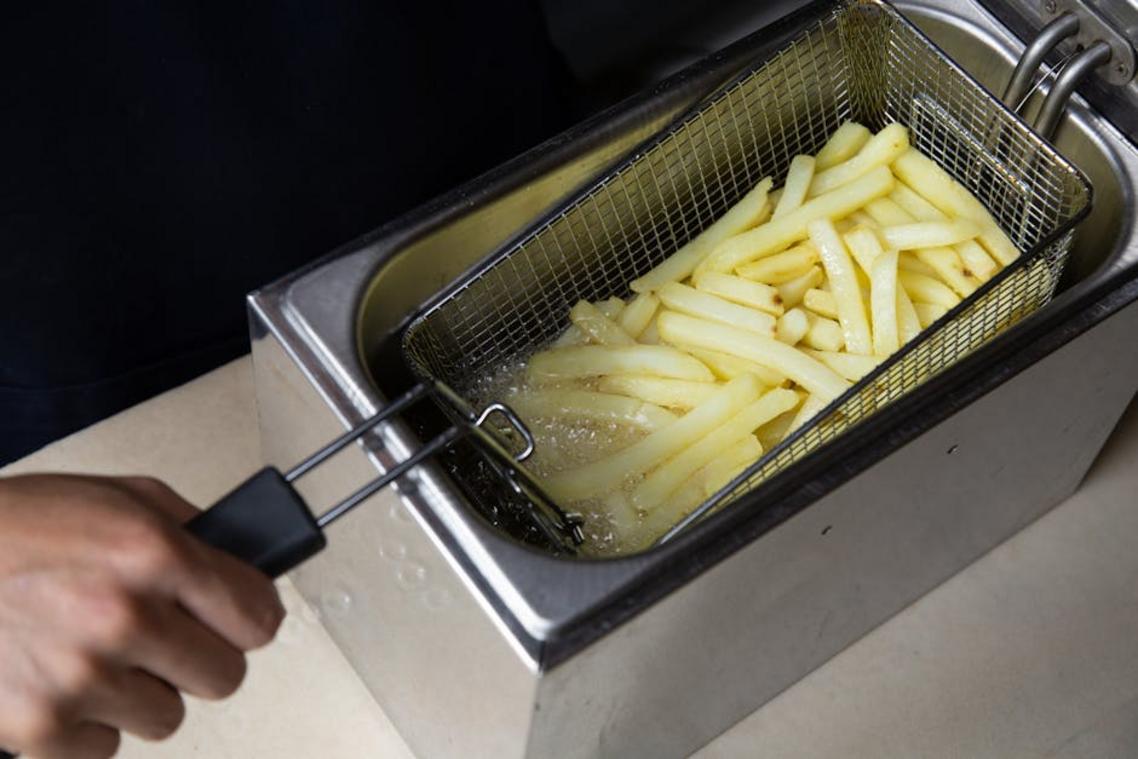
Now let’s talk temperature.
350 to 375°F is your sweet spot. Go lower and your food absorbs oil like a sponge. Go higher and you’ll char the outside while the inside stays raw.
Don’t have a thermometer? Drop a small bread cube in the oil. If it browns in about 60 seconds, you’re good. Or stick a wooden spoon handle in. See bubbles forming around it? That’s your green light.
(I predict more home cooks will start using infrared thermometers in the next few years. They’re getting cheaper and they’re way more accurate than guessing.)
Keep that temperature steady. This is the real secret to preventing oil absorption. When the oil stays hot enough, it creates a barrier on the food’s surface. The moisture inside turns to steam and pushes outward. Oil can’t get in.
For seasoning, you’ve got two moves.
Season the dough or batter before frying. Mix in triguisar or sazón so the flavor goes all the way through. Or wait until the food comes out of the oil and hit it with salt immediately. The salt sticks better to hot, oily surfaces and you get that satisfying crunch with every bite.
I do both sometimes. Depends on what I’m making.
Here’s the mistake that ruins everything.
Crowding the pan.
You drop too much food in at once and the oil temperature crashes. Instead of frying, you’re basically steaming your food in lukewarm oil. It gets greasy, limp, and sad.
Fry in small batches. Give each piece room. Yeah, it takes longer. But you’re following a frying guide Cwbiancarecipes approach that actually works, not just trying to get dinner done faster. By embracing the meticulous frying techniques outlined in the Cwbiancarecipes, you ensure that each batch achieves a perfectly crispy texture, elevating your culinary experience beyond mere convenience. By taking the time to follow the precise frying techniques described in the Cwbiancarecipes, you elevate your culinary skills and ensure that every bite is perfectly crispy and delicious.
Your patience pays off when you bite into something actually crispy.
Essential Tools for Flawless Frying
You can’t fry well without the right setup.
I learned this the hard way in my Dallas kitchen when I tried making chicharrones in a flimsy pan. Oil everywhere. Uneven browning. A mess I’m still not over.
Here’s what actually works.
The Right Vessel
Get yourself a heavy-bottomed pot or Dutch oven. If you’ve got a deep-sided cast-iron skillet, that works too.
Skip the shallow frying pan. You need depth and weight. The thick bottom spreads heat evenly so you don’t get hot spots that burn your food while other parts stay pale. Plus, deeper sides mean less chance of oil splashing onto your stovetop (or worse, your arm).
Key Utensils
A spider strainer is your best friend here. Those wire mesh scoops let you fish out fried items without bringing half the oil with them.
For bigger pieces like chicharrones or bone-in chicken, grab some tongs. You need the reach and grip.
Some folks say a slotted spoon does the job. Sure, it works. But when you’re pulling out delicate items that took 10 minutes to get perfect, you want the control a spider gives you.
The Drying Station
Set up a wire rack over a baking sheet before you start frying.
Paper towels seem like the obvious choice. But they trap steam underneath your food, which turns that perfect crispy exterior soggy in minutes. A wire rack lets air circulate on all sides so everything stays crunchy.
This is standard practice at cwbiancarecipes for a reason. It works.
Pro tip: Keep your drying station at least three feet from your frying vessel. Hot oil and reaching across things don’t mix well.
Technique in Action: Perfecting the Colombian Empanada
Look, I’ve seen plenty of empanadas fall apart in the oil.
The filling spills out. The dough cracks. You end up with a greasy mess instead of that perfect golden pocket you were going for.
Here’s what makes the difference.
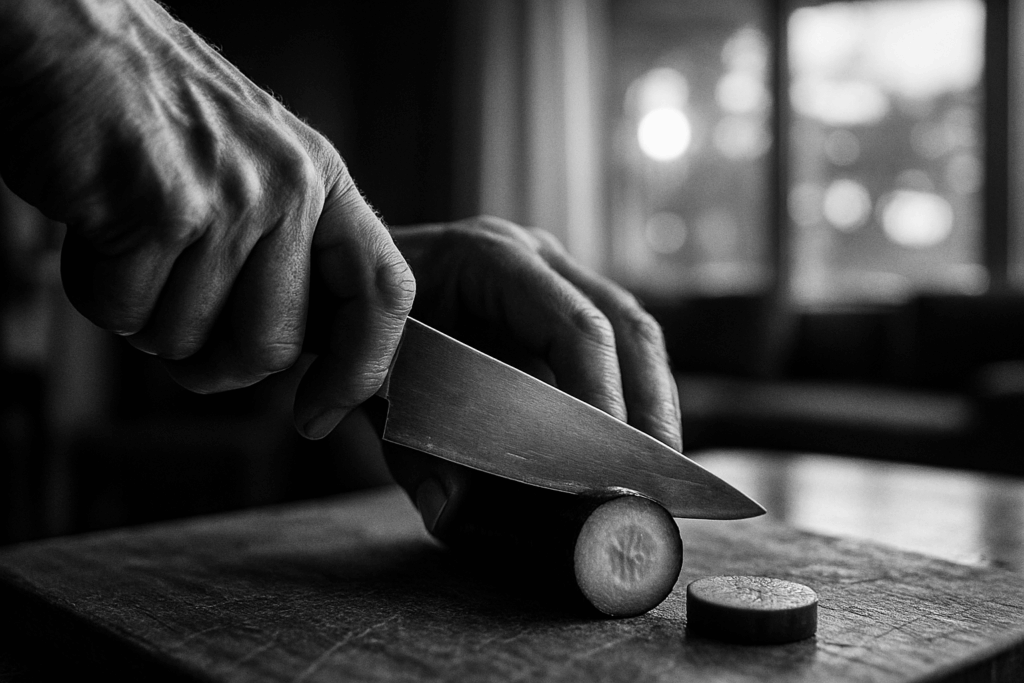
Start with your masa. You need masarepa, which is pre-cooked cornmeal. Not regular cornmeal. Not masa harina. Masarepa.
The dough needs to be SMOOTH and well-hydrated. If it’s too dry, it’ll crack the second it hits the oil. Work in your water slowly until the dough feels soft but not sticky (kind of like Play-Doh, if we’re being honest).
Now here’s where most people mess up.
The seal. This is everything.
Take a fork and press down along the edges. Really press. Or use the rim of a plate to crimp it shut. You want that seal TIGHT because once you drop these into hot oil, any weak spot will blow open. As you master the art of sealing your pastry, remember that the same attention to detail applies when experimenting with Fresh Fruit Cwbiancarecipes, ensuring each bite bursts with flavor without any messy leaks. As you master the art of sealing your pastry, remember that the same attention to detail applies when experimenting with Fresh Fruit Cwbiancarecipes, where a perfect balance of flavors can elevate your culinary creations to new heights.
Some folks say you can get away with a loose seal if you’re careful. They’re wrong. I’ve tested this more times than I care to admit, and a weak seal always fails.
When you’re ready to fry, heat your oil to about 350°F. Gently slide the empanada in. It should sink for a second, then float back up.
Watch for the shell to puff and blister. That’s your sign that it’s frying properly. The dough is creating those air pockets that give you that signature texture.
Give it 2 to 3 minutes per side. You’re looking for a DEEP golden brown. Not pale yellow. Not light tan. Golden brown.
Under-frying leaves you with a soft, sad shell that won’t hold up. And trust me, after all that work on your cooking recipes cwbiancarecipes, you don’t want a soggy empanada.
Pro tip: Don’t crowd the pan. Fry two or three at a time so the oil temperature stays consistent.
That’s it. Master these steps and you’ll have empanadas that actually stay together.
Mastering Papas Rellenas (Stuffed Potatoes)
Here’s what you need to know about frying these beauties.
The real challenge isn’t the filling or the mashing. It’s getting a soft potato ball to hold together in hot oil without falling apart.
The secret? Your coating technique.
Start with a thin layer of flour on your stuffed potato ball. Just dust it. Then dip it in a light batter made from flour, beaten egg, and your seasonings. Nothing fancy.
The batter should be thin enough to coat evenly but thick enough to cling.
Now for the frying part.
Papas rellenas need a gentle touch. I’m talking about carefully lowering them into oil that’s around 350°F. Not dropping them in like you’re making a statement.
Fry until the outer crust turns golden and firms up. Your filling is already cooked, so you’re just heating it through and creating that crispy shell. Should take about 4 to 5 minutes.
Here’s where most people mess up.
They make their filling too wet. Ground beef swimming in sauce or vegetables that haven’t been drained properly. That moisture builds up pressure inside the potato ball and boom. You’ve got an oil splatter situation and a broken papa rellena floating in pieces.
Keep your filling flavorful but dry. If you’re using meat, cook off the excess liquid. If you’re adding vegetables, pat them down first.
Think of it like this. You want the inside moist enough to taste good but dry enough to stay put (kind of like the difference between a fresh fruit cwbiancarecipes salad and one that’s been sitting too long).
Follow the frying guide cwbiancarecipes approach and you’ll get that perfect golden crust every time without the drama.
Advanced Frying: Arepas de Huevo and Chicharrones
Let me tell you about two techniques that separate home cooks from people who really understand frying.
Arepa de Huevo is wild. You fry the dough first until it puffs up like a little pillow. Then you cut a small opening and crack a raw egg right inside. Back into the oil it goes.
The egg cooks while sealed in that crispy shell. It’s messy to make and honestly a little stressful (you’re working with hot oil and raw eggs). But when you bite into one? Worth every second. This ties directly into what we cover in Refreshments Cwbiancarecipes.
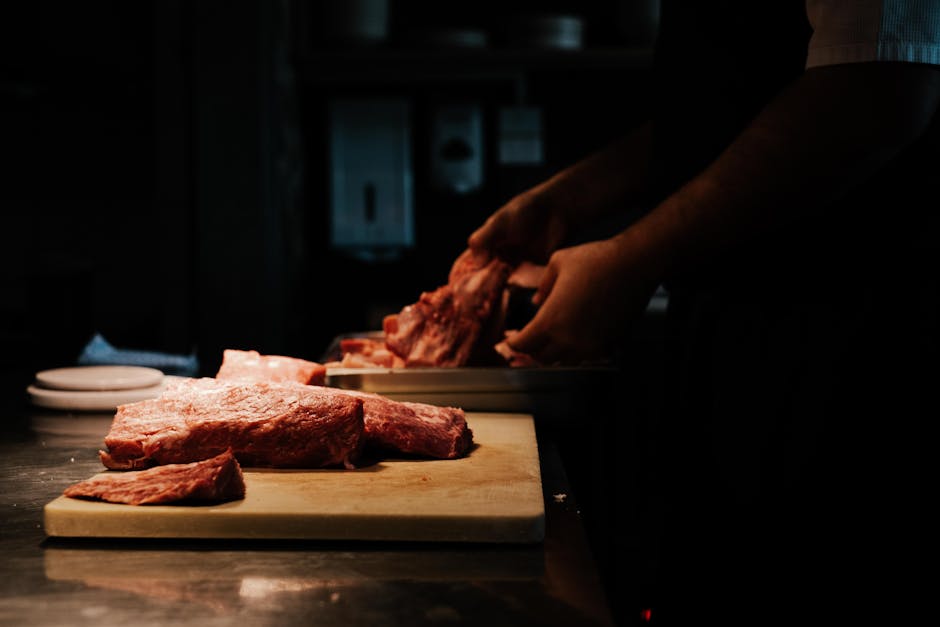
Now chicharrón is where most people get it wrong.
They think you just throw pork belly into hot oil and wait for magic. That’s how you get rubbery skin with burnt edges.
The real move? Start the pork belly in water. I know it sounds backwards. But this slow simmer renders out the fat before you ever touch high heat. The meat stays tender while the skin dries out just enough.
Then you crank up the temperature and watch it transform into something incredible. Crunchy skin that shatters when you bite it. Meat that practically melts. As you experiment with the tantalizing flavors and techniques from Cooking Recipes Cwbiancarecipes, you’ll find that cranking up the temperature not only enhances the dish but also brings about that glorious transformation into a culinary masterpiece with crunchy skin and melt-in-your-mouth meat. As you delve deeper into the art of cooking, the secrets revealed in Cooking Recipes Cwbiancarecipes will inspire you to push the boundaries of flavor and texture, transforming simple ingredients into culinary masterpieces.
This is the kind of stuff you’ll find in our frying guide cwbiancarecipes if you want to go deeper.
Both techniques take patience. But that’s what makes them worth learning.
Your Journey into Colombian Cuisine
You came here to learn how to fry Colombian food the right way.
Now you have the techniques and cultural knowledge to pull it off. You can make empanadas that stay crispy and papas rellenas that aren’t swimming in grease.
I’ve shown you what matters most: the right oil, stable temperature, and proper technique. These fundamentals are what separate soggy disasters from restaurant-quality results.
The frying guide cwbiancarecipes gives you everything you need to cook authentic Colombian classics at home.
No more guessing. No more wasted ingredients.
Here’s what you should do next: Heat your oil and pick your first dish. Start with something simple like empanadas or buñuelos. Get comfortable with the temperature control and timing.
The techniques work. You just need to use them.
Your kitchen is ready. The only question left is which Colombian classic you’ll master first. Fresh Fruit Cwbiancarecipes.
 Ryvel Elthros is the kind of writer who genuinely cannot publish something without checking it twice. Maybe three times. They came to healthy cooking tips through years of hands-on work rather than theory, which means the things they writes about — Healthy Cooking Tips, Seasonal and Festive Recipes, Culinary Techniques and Tricks, among other areas — are things they has actually tested, questioned, and revised opinions on more than once.
That shows in the work. Ryvel's pieces tend to go a level deeper than most. Not in a way that becomes unreadable, but in a way that makes you realize you'd been missing something important. They has a habit of finding the detail that everybody else glosses over and making it the center of the story — which sounds simple, but takes a rare combination of curiosity and patience to pull off consistently. The writing never feels rushed. It feels like someone who sat with the subject long enough to actually understand it.
Outside of specific topics, what Ryvel cares about most is whether the reader walks away with something useful. Not impressed. Not entertained. Useful. That's a harder bar to clear than it sounds, and they clears it more often than not — which is why readers tend to remember Ryvel's articles long after they've forgotten the headline.
Ryvel Elthros is the kind of writer who genuinely cannot publish something without checking it twice. Maybe three times. They came to healthy cooking tips through years of hands-on work rather than theory, which means the things they writes about — Healthy Cooking Tips, Seasonal and Festive Recipes, Culinary Techniques and Tricks, among other areas — are things they has actually tested, questioned, and revised opinions on more than once.
That shows in the work. Ryvel's pieces tend to go a level deeper than most. Not in a way that becomes unreadable, but in a way that makes you realize you'd been missing something important. They has a habit of finding the detail that everybody else glosses over and making it the center of the story — which sounds simple, but takes a rare combination of curiosity and patience to pull off consistently. The writing never feels rushed. It feels like someone who sat with the subject long enough to actually understand it.
Outside of specific topics, what Ryvel cares about most is whether the reader walks away with something useful. Not impressed. Not entertained. Useful. That's a harder bar to clear than it sounds, and they clears it more often than not — which is why readers tend to remember Ryvel's articles long after they've forgotten the headline.