What Searing Actually Does
Let’s get one thing straight: searing doesn’t “seal in juices.” That idea is still kicking around, but it’s dead weight. Meat isn’t a watertight container it’s a porous structure. Once heat hits the surface, some water is going to evaporate. That’s physics, not failure.
What you are doing when you sear is building flavor. At high heat, the surface of the meat undergoes a quick dehydration the moisture boils off, and what’s left behind starts to brown. This browning is more than just a good looking crust. It’s the Maillard reaction in action.
Here’s the simple science: amino acids (that come from proteins) react with sugars (naturally present in meat) when exposed to heat. That reaction creates hundreds of new flavor compounds. Nutty, savory, complex tones that give seared food its irresistible edge.
You’re not locking anything in. You’re turning basic ingredients into something that hits harder on the palate. Searing isn’t preservation it’s transformation.
Heat Matters More Than You Think
Searing isn’t just about heat it’s about the right heat. To trigger the Maillard reaction (that complex browned flavor we all chase), your pan needs to be ripping hot. We’re talking 400 500°F depending on the protein. That zone is where surface moisture evaporates instantly, allowing browning not steaming to take place.
When the temperature’s too low, meat releases juices faster than they can evaporate. Instead of a sear, you get a stewed surface gray, wet, and flavorless. That’s lost potential. You want a dry, steady heat that scars the surface, not one that coddles it.
Control is key here. High heat, yes but not chaos. Preheat the pan properly, and don’t crowd it. A hot pan and patience beat flames and guesswork every time.
If you’re still unsure, this deeper dive breaks down the science: Why cooking at the right temperature matters.
Tools That Make or Break Your Sear
Getting a deep, flavorful sear isn’t just about cooking skill it’s also about the gear you use. The right tools don’t just support searing; they determine whether you get a rich, browned crust or a pale, steamed disappointment.
Cast Iron vs. Stainless Steel
Both cast iron and stainless steel have their place in the searing world, but what you choose depends on your cooking goals:
Cast Iron
Excellent heat retention
Creates an evenly browned crust
Great for proteins that take longer to sear (e.g., thicker steaks or pork chops)
Stainless Steel
Heats up and cools down faster
Better responsiveness to temperature changes
Ideal for quick sears or when finishing proteins in a sauce
Tip: Avoid nonstick pans for searing. They typically can’t withstand the high temperatures needed and they won’t develop that crave worthy crust.
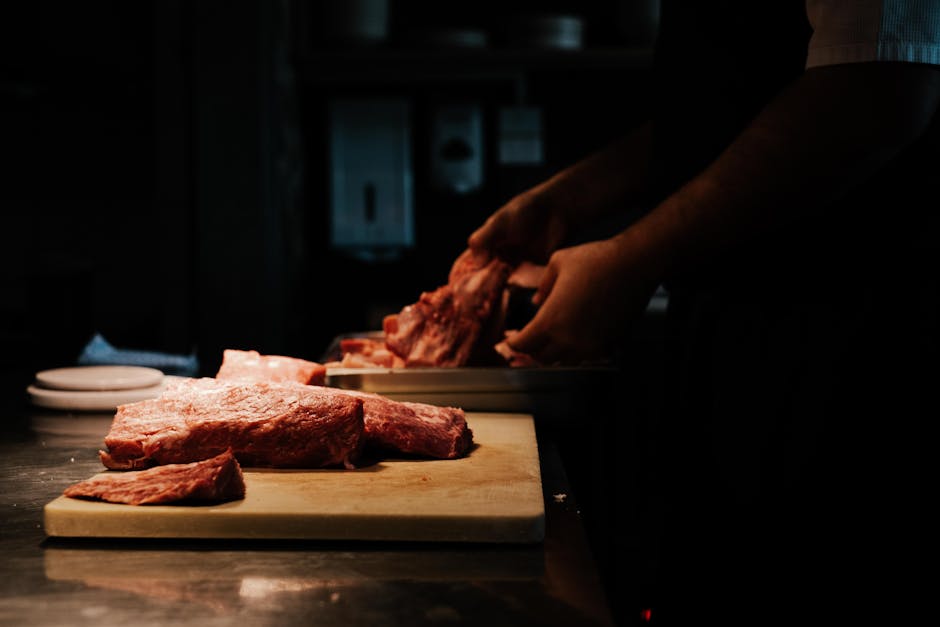
Don’t Overcrowd the Pan
One of the most common searing mistakes is trying to cook too much at once. When a pan becomes crowded:
The temperature drops rapidly
Moisture builds up and causes steaming, not browning
Food ends up soggy and pale instead of crisp and caramelized
Solution: Work in batches if necessary. Allow room between each piece of meat or vegetable so hot air and pan heat do their job.
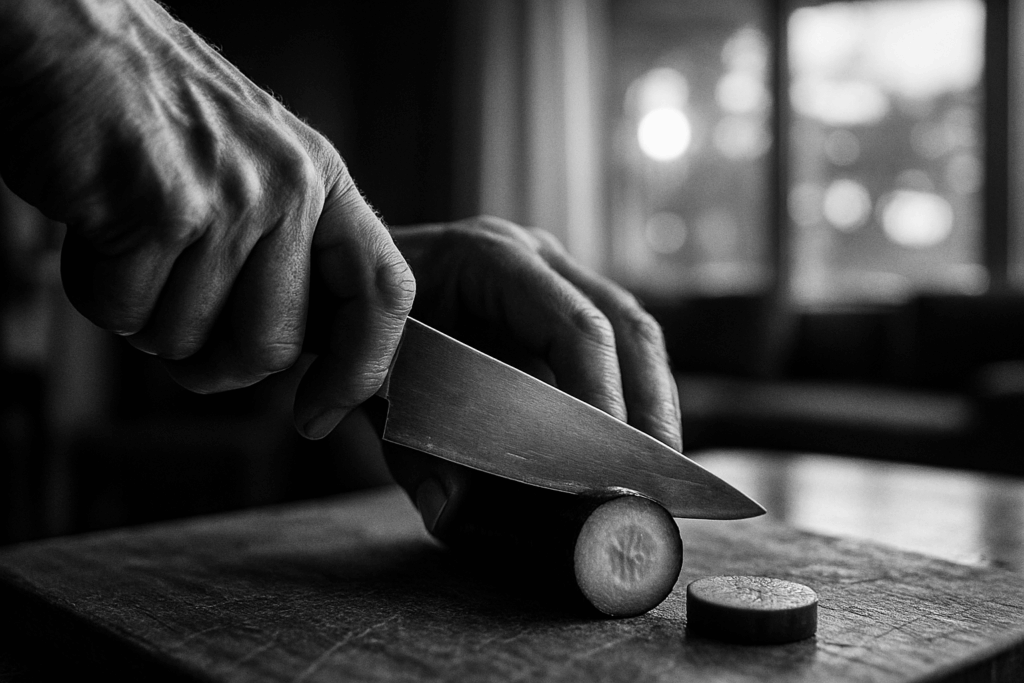
Dry Surface = Better Crust
Moisture is the enemy of effective searing. Even if your pan is properly heated, excessive moisture on the surface of your food will:
Delay browning
Create steam instead of a crust
Lead to uneven texture
Best Practice:
Pat meat or vegetables dry thoroughly with paper towels before searing
Bring proteins to room temperature briefly before cooking to reduce internal moisture
Avoid adding too much oil just a thin layer is enough
When it comes to searing, it’s not just about heat it’s about preparation. The best tools support the process, while small mistakes like overcrowding or starting with wet ingredients can sabotage your results.
Techniques That Maximize Flavor
Searing is more than just blasting heat and hoping for a crust. Timing is your first weapon. The sweet spot for most proteins is 1.5 to 3 minutes per side, depending on thickness. Too short, and you miss the Maillard magic. Too long, and you’re cooking past the crust into chewy territory. Trust your senses look for deep browning, not blackened edges. Don’t walk away from the pan.
Basting isn’t mandatory, but when you do it right, it elevates everything. A spoonful of hot fat over the surface helps develop flavor evenly, especially in thicker cuts that stay in the pan a little longer. Butter, aromatics, a tilt of the pan, and a few steady wrist motions that’s it. But with thinner cuts or delicate items, leave them be. A good sear needs uninterrupted contact.
Finally, rest. Always. Even a quick 5 minute pause lets the juices redistribute before slicing. Cut too soon and the plate swims. Let it sit, and you get texture, balance, and a juicier bite from edge to center. That’s the difference between rushed and done right.
Searing Beyond Steak
Searing isn’t just for beef it’s a universal technique that delivers bold, complex flavor across proteins and even vegetables. Fish, chicken, and produce benefit from the same fundamentals: high heat, dry surface, and minimal movement.
For fish like salmon or snapper, the goal is crisp skin without overcooking the flesh. That means a ripping hot pan with just enough oil to prevent sticking, and a strict hands off policy for the first couple of minutes. Chicken especially thighs or bone in cuts needs longer searing to build that golden crust and render fat. Here, it’s worth adjusting your fat source; high smoke point oils like avocado or ghee work better than butter, which burns fast.
Vegetables also shine with a proper sear. Think blistered Brussels sprouts or charred zucchini. The trick is low moisture and spacing them out so they roast, not steam. Olive oil works well here, but other fats like duck fat or coconut oil bring dimension depending on the dish.
But searing isn’t the end it’s the setup. That browned crust becomes the anchor for flavor layering: scrape up those fond bits with wine or stock and build a pan sauce. Or toss seared meat into a longer braise, where that initial high heat hit adds depth and complexity down the line.
Nail the sear, and you’re not just cooking you’re building flavor from the ground up.
The 2026 Evolution of Searing
Searing has come a long way from just hot pans and hope. In 2026, kitchen tech is transforming how home cooks approach high heat cooking. Precision is now more accessible than ever and it’s helping deliver consistent, professional quality results.
Smarter Equipment, Better Searing
Gone are the days of guessing whether your pan is hot enough. New technology gives home cooks precise control over temperature and timing.
Smart induction burners now come with built in thermal sensors that maintain exact temperature settings, even when ingredients hit the pan.
AI controlled pans can adjust heating zones on the fly to avoid cold spots or scorched areas.
Pre calibrated cookware embedded with heat regulating metals offers even, controllable browning without overheating.
AI Meets the Stovetop
Artificial intelligence has entered the kitchen in a major way, especially when it comes to searing. Assisted cooking platforms are taking guesswork off the menu.
Apps sync with smart burners or compatible cookware to guide searing in real time.
Predictive algorithms suggest optimal searing times based on ingredient type, thickness, and even ambient kitchen conditions.
Some systems auto adjust heat output mid cook to prevent over or under searing.
At Home Science, Big Results
Today’s food science tools help home cooks control flavor development in ways that once belonged only in restaurant kitchens.
Infrared thermometers give instant surface readings so you can hit the Maillard zone with accuracy.
Moisture meters help determine when proteins have reached the right dryness level before hitting the pan.
Digital recipe guides from food labs now include step by step temperature cues for mastering searing across proteins and produce.
Why It Matters
Modern searing tech isn’t just about convenience it’s about getting reliable, repeatable results. With precision gear and real time guidance, the mystery of a perfect crust fades, and skill takes the lead.
Less trial, more technique
Consistency unlocks creativity
Science makes better flavor possible in every kitchen
Final Thought: Control, Not Luck
Searing isn’t a party trick. It’s a controlled process built on timing, heat, surface prep, and a basic grasp of chemistry. You don’t need to be a food scientist, but you do need to pay attention. Know your pan, manage your temperatures, and dry your protein every time.
This isn’t about sealing in juice (that’s a myth). It’s about triggering the Maillard reaction just right and building layers of flavor through intentional technique. Skip the guesswork. If your food isn’t browning, your pan’s probably too cold. If it’s smoking out your kitchen in seconds, ease off the heat or pick a better fat oil.
In short: searing rewards precision. When you understand why things brown and how to make that happen repeatedly you stop hoping for flavor and start delivering it. That’s the difference between cooking and actually knowing what you’re doing.
 Ryvel Elthros is the kind of writer who genuinely cannot publish something without checking it twice. Maybe three times. They came to healthy cooking tips through years of hands-on work rather than theory, which means the things they writes about — Healthy Cooking Tips, Seasonal and Festive Recipes, Culinary Techniques and Tricks, among other areas — are things they has actually tested, questioned, and revised opinions on more than once.
That shows in the work. Ryvel's pieces tend to go a level deeper than most. Not in a way that becomes unreadable, but in a way that makes you realize you'd been missing something important. They has a habit of finding the detail that everybody else glosses over and making it the center of the story — which sounds simple, but takes a rare combination of curiosity and patience to pull off consistently. The writing never feels rushed. It feels like someone who sat with the subject long enough to actually understand it.
Outside of specific topics, what Ryvel cares about most is whether the reader walks away with something useful. Not impressed. Not entertained. Useful. That's a harder bar to clear than it sounds, and they clears it more often than not — which is why readers tend to remember Ryvel's articles long after they've forgotten the headline.
Ryvel Elthros is the kind of writer who genuinely cannot publish something without checking it twice. Maybe three times. They came to healthy cooking tips through years of hands-on work rather than theory, which means the things they writes about — Healthy Cooking Tips, Seasonal and Festive Recipes, Culinary Techniques and Tricks, among other areas — are things they has actually tested, questioned, and revised opinions on more than once.
That shows in the work. Ryvel's pieces tend to go a level deeper than most. Not in a way that becomes unreadable, but in a way that makes you realize you'd been missing something important. They has a habit of finding the detail that everybody else glosses over and making it the center of the story — which sounds simple, but takes a rare combination of curiosity and patience to pull off consistently. The writing never feels rushed. It feels like someone who sat with the subject long enough to actually understand it.
Outside of specific topics, what Ryvel cares about most is whether the reader walks away with something useful. Not impressed. Not entertained. Useful. That's a harder bar to clear than it sounds, and they clears it more often than not — which is why readers tend to remember Ryvel's articles long after they've forgotten the headline.